DIY

This is Halloween

Oh man. Where to begin? I’m a little crazy for Halloween. Some might say this is in direct rebellion to my sheltered, conservative Christian upbringing where everything from scary movies to Harry Potter was banned…. but I would disagree. My mom went all out on the costumes each year, sewing poodle skirts and turning rope into Princess Leia buns. We gathered pillowcases full of candy at our church’s Fall Festival event. I didn’t feel like I was ‘missing’ anything from the Halloween experience as a kid, even if we didn’t technically celebrate All Hallow’s Eve.

However, as the years pass, I fall more entranced with the magic of Halloween. October is a month for horror movie marathons, costume parties, haunted houses, potion-like cocktails, and creepy crawly cupcakes. Just this week I read Alice Hoffman’s “Practical Magic”, which was a delightful way to get into the spirit of things. I am also looking forward to the new Netflix series The Haunting of Bly Manor (a follow-up to the stunningly brilliant The Haunting of Hill House). The pandemic may have taken over our lives… but it will never take our Halloween!

Decorating was more of a challenge than usual this year. My budget was slim to none, so I looked around for pieces I could “upcycle” in my own home.

I started with some homemade artwork. Finding inspirational pieces on Etsy to mimic, I used a ruler and a pencil (with a large eraser) to translate the images onto sheets of cardstock. I then cut out the designs to create a “stencil” for my paintings. I placed the stencil on a piece of white paper and used black paint and a thin brush to fill in the space beneath. The stencil wasn’t very robust, so some of my lines got a little wonky but I just smoothed them out freehand. I removed the watercolor paintings from the frames in our dining room and swapped in my new artwork. I think the paint blotches and wobbles add some character to the final look! What do you think of my dining room décor?

Next up was the mantle. I have never had a fireplace before, so I was particularly excited to tackle this one. I’ve been saving my old wine bottles after discovering all the wonderful projects you can make with them. I grabbed two and spritzed them with black matte spray paint. I really like the minimalist look right now, but closer to Halloween I might add some tapered candles or some potion bottle labels. I splurged on a $5 tree at Target (that darn dollar section gets me every time). For a final touch, I decided to make tassel “ghosts”. I bought some thick, white yarn to use in a macrame project a few months ago and there was still a bit left. I found a book that was the same width as the length I wanted my ghosts to be and started to wrap. It only took 10 loops to get a nice, thick ghost shape. After tying off the heads, I cut out eyes from a sheet of black felt and glued them on. Ta-Da!

My final project to date was a wreath for the door. While I usually don’t bother opening marketing emails, I happened to notice that JoAnn Fabrics had an 18” wreath on sale for $2.50I I couldn’t pass that one up, so I immediately drove to my nearest JoAnn. I also grabbed a a pack of faerie lights (on clearance for $3.50). Once I got home, I spray-painted the wreath matte black to match the rest of my décor. While the paint dried, I cut out flower petals and leaves, following a number of tutorials online (type “DIY Paper Flowers” into a Pinterest search. You won’t be disappointed). I wrapped the faerie lights carefully around the wreath, then secured the flowers with hot glue. I had no idea what I was doing, I just kept adding flowers until I liked the look! I hung it on our front door and, while I’m happy with the wreath, it’s a little hard to appreciate the black detail against the black front door. Someone suggested adding gold or white tips to make it stand out more, along with some bats to add to the spookiness! I’ll be working on those updates in the next few weeks.

These were all projects I did in the space of a few afternoons, while cookies were in the oven or football was on. I spent less than $20, so I don’t feel obligated to store any of it in my closet to put up next year. I don’t mind updating my wreath with more paint or redoing the artwork on the wall if I decide I don’t like them. I love the freedom and flexibility that DIY projects offer.

I’ve got a few more craft ideas on the back burner and LOTS of Halloween treats to bake. I’ll continue to share throughout the month!

How are you decorating for the season? Are you going spooky or cozy? Let me know what’s inspiring you right now!

DIY

DIY 006: Starting a Podcast

Podcasting is not a traditional part of the “DIY” landscape, but it definitely fits with the rest of my recent creative/entrepreneurial pursuits. At the very beginning of quarantine, several of my co-workers and I decided that we wanted to start a film club. Our plan was to take turns picking movies to watch during the week and then get on a call to discuss them. Whoever selected the movie would serve as the host and steer the conversation (or, more like keep it from going completely off the rails). The plan continued to evolve once we realized we had access to audio equipment capable of recording the calls. A film club quarantine podcast? Let’s do it!

We jumped right in, watching “Day of the Locust” to kick off the series. I volunteered to edit the episodes… primarily as an alternative to the responsibility of hosting. While I certainly enjoy movies, my knowledge of and experience in film is lightyears behind those of my co-podcasters. Tommy is a working DP (with his most recent movie currently streaming on Amazon). Colin and Garrett both went to film school and have extensive filmmaking experience. Jon spent fourteen years writing for American Cinematographer magazine.

And I’m over here like… I was a robot on Westworld?

The great part is– we all bring extremely unique perspectives to each film. That’s why we ended up calling ourselves the “Viewfinder Film Club”. We watch each movie through our own lens and bring our respective takes to the discussion.

After skimming some tutorials and watching a few YouTube videos, I started editing the episodes. Garrett hooked us up with a Twitter and Instagram account. We built a website to record show notes and contact information. Jon recorded “intros” for each episode with updates and general housekeeping. Colin’s friend even made us super rad cover art:

We were ready for launch. The first three episodes went up on Podbean for distribution. You can officially hear us on Podbean, Spotify, and Apple Podcasts!

The podcast is certainly niche. The movies span a mix of genres and time periods– from Mizoguchi’s “A Story from Chikamatsu” (1954) to Paul Schrader’s “First Reformed” (2018) to Scorcese’s “Bringing out the Dead” (1999). We’ve watched notoriously bad movies (Lynch’s “Dune”) to Academy Award winners (Stalag 17). I’ve jokingly referred to these weekly discussions as my own personal film school– even the worst movies still utilize interesting filmmaking techniques. We discuss the scores and the lighting, the directing and storytelling. We all take notes on the film and bring in outside research. It all adds up to a deeply satisfying, intelligent conversation about the creative language of film.

If you’re interested in listening, I’d recommend selecting an episode that discusses a movie you’ve already seen. We analyze (aka spoil) every plot point during our conversations. Personally, I loved our conversations on “First Reformed” and “Dune”– we really hit our stride in those episodes.

While quarantine has eliminated a lot of social interactions, it has really allowed this group activity to flourish. We can’t wait to record in person someday, but until then we’ll keep jumping on our weekly call and exploring the world of film.

DIY

DIY 005: Fixer Upper

Why yes, I have binged all five seasons of Fixer Upper during quarantine. Thanks for asking.

While it is my dream to someday do some full-on home renos, I have had to settle for some small-time projects on our rental properties. We have six small houses in the Lancaster area that were built in the 1960s and regularly require some love. We recently had a tenant move out so I went to go do a little fixin’.

Isn’t she sweet?

Side Note: The first time we fixed up one of the units, I got a little overambitious. I started working on forty different projects (including refinishing all the kitchen cabinets, painting the entire house, and repairing the patio trellis). Did I mention I thought I could do all this in a single weekend? Yeah. No way. My in-laws, aka our property managers, had to call in a handyman to finish all my projects. So I have a more realistic idea of my limitations now.

Project 1: Changing out the Locks

I’m pretty sure the locks on the doors hadn’t been changed for a decade or two. The metal was rusted, dented, and didn’t latch well. When the tenant turned in her keys, she mentioned that on windy days the door would bang open if she didn’t have it bolted! We would definitely have fixed that if we’d known, but better late than never.

I had never switched out a lock before, but after watching a couple YouTube videos I was fairly sure I could make it happen. I bought two sets of Kwikset Entry Locks— one for the front door and one for the exterior entrance to the garage. Thankfully, I remembered to find two matching sets (so the same key works on all the locks). Wouldn’t have known to look for that without a tutorial video!

How to match multiple locks to the same key. The things they don’t teach you in college…

I began unscrewing the old deadbolt and everything was looking pretty straightforward. Then, I hit a speedbump: one of the screws holding the bottom lock in place was completely stripped. I tried all of my various screwdriver heads, but the hole was completely circular. I googled various ways of getting out a stripped screw (use pliers! nope. jam a rubber band in and twist with screwdriver! nope).

Finally, my mother-in-law, Marlene, said, “We have a good drill you could use”.

Marlene is from Argentina and sometimes there’s a communication issue. I looked at her quizzically, “What do you mean?”

She answered excitedly, “If you push hard, it might come out.”

I tried to picture it happening and while I wasn’t totally convinced, I figured it was worth a shot. I picked up the drill and rammed it into the nail. It was super powerful and as soon as I put my weight into it, I felt the screw move! In my excitement, I only moved the screw out halfway and ended up having to use pliers to unscrew it the rest of the way. Yeah, yeah, I’ve got a bit of a learning curve y’all. But thank you, Marlene!!

The doorknob install went very smoothly, but the lower latch was still not catching very well. I jiggled the door and when I lifted it up, the latch slid right in. Hmm. I opened the door and took a look at the hinges. The top hinge turned out to be really loose. As soon as I tightened the screws, the whole door stood up straighter and locked properly. Calling it a win.

Project 2: Installing a Thermostat

After my success with the doorknobs, I felt invincible. The wall thermostat was ancient and cracked– quite the eyesore. I was confident that I could replace it with a sharper looking one… event though I had never taken on electrical wiring before. (Confidence or arrogance? It’s a fine line.) I picked up a basic Honeywell Home thermostat and went to work.

I knew the first step was turning off the power to the HVAC system. Well, I had no idea where the main service panel was located. After looking through all the rooms, then the garage, I finally found the box on the far side of the house just above some shrubs. Aaaand most of the controls weren’t labeled. For fear of getting shocked, I switched them ALL off.

It was a great start.

I went back into the dark, no-longer-air-conditioned house, and started prying off the old thermostat. With a little jiggling, the cover popped off the wall. I then unscrewed the panel and carefully unscrewed the two wires connected to the plate (an “R” and a “W”). I connected the wires to the new panel and screwed it into the wall… before realizing there was a “cover plate” that would hide the part of the wall where the old thermostat had rested. So, I took the panel off, put the cover on, then reattached the wires, and screwed it all into the wall. Whew. Second times a charm, eh? Then, I turned back on the electricity, crossed my fingers, and turned the heat on. It worked.

Moral of the Story: Electrical work is really not all that scary.

Project 3: Repairing a Baseboard

My last project of the day was to install a new piece of baseboard in the living room. There was a seven-inch gap right next to the door where a piece was clearly missing. After measuring the section, I went to Home Depot and found a similar piece of baseboard for sale. The baseboard was sold by the foot and I definitely didn’t need all 10-ft of the piece I was holding. With nary a worker in site, I took it to the self-service cart and took a handsaw to it.

Side Note: From now on, I will exclusively request tools as birthday and Christmas gifts. Using the drill and handsaw this weekend were crack. I want more of that in my life.

Armed with my perfectly cut piece of baseboard, I lined it up on the wall… only to find that there was a little bit of tile jutting out above the floor about 1/4″. This made my piece sit up higher than the rest of the baseboard, but I couldn’t worry about it at that point. I popped in a couple finishing nails and set about caulking. I tried to make the caulk help the height difference “disappear”, but it wasn’t all that effective. Regardless, the gap was filled. I was ready to hit the road, so I asked Marlene if she wouldn’t mind painting it the next day. She readily obliged.

Still needs painting, but hey! It’s an improvement.

Side Note: Marlene spent the entire afternoon and evening putting contact paper in all the kitchen cabinets. She’s a trooper.

So, unfortunately, none of these projects will likely land me my own HGTV show. But, I did want to share my adventures to hopefully encourage you to take on tasks around your house. There’s so much you can do with a little help from YouTube! It’s empowering to fix things. And we could all use that bit of morale boost these days…

DIY

DIY 004: Making a Tassel Chandelier

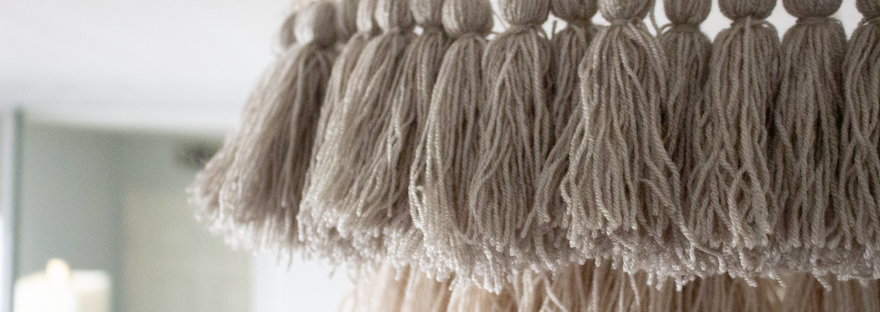
Anyone else obsessed with Anthropologie’s Fela Tasseled Chandelier? I’ve been seeing it everywhere lately (ok, Google algorithm, stop tempting me already). After watching a third Instagram home renovator hang the light, I was convinced: I could totally make one.

I found some homemade versions on Pinterest and Etsy, but wasn’t overly impressed. The thickness of the tassel thread made a huge difference on the overall appearance (thick yarn looked particularly tacky). I also thought three layers of shorter tassels looked more glamorous than two layers of longer. I was really inspired by some of the ombre looks, though!

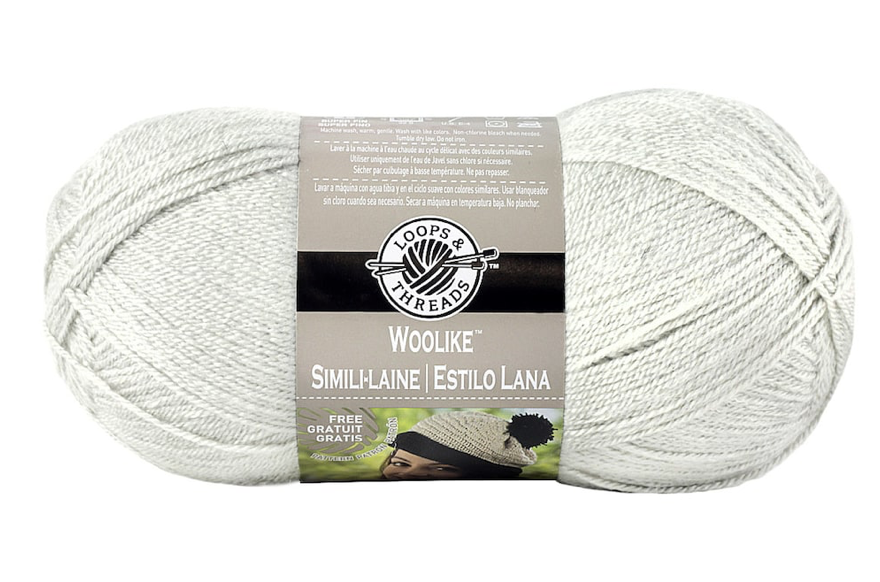
Instead of ordering thread on Amazon, I decided to go to Michaels and actually look at the options available. I landed on a crochet thread called Woolike Yarn by Loops & Thread, based on the color availability, weight of the strands, and the price. While I was there, I also picked up three floral hoops, some gold wire, and a gold chain. Here’s the full supply and cost list:

Materials

  • Woolike Yarn– I ended up using about two spools of yarn per ring. If you’re doing it all one color you could probably get away with five spools.
  • Gold Chain– I ended up splitting this into three pieces and attaching them together with a small loop of wire as my “hanger”.
  • Gold Wire
  • Floral Hoops – I purchased a 19″, 14″, and a 10″ in gold
  • Gold Wire
  • Scissors
  • Small Book or Picture Frame- I used a small, hardcover book of poetry that was 4.5″ wide and 0.75″ deep (the length from top to bottom doesn’t matter, as you’ll just be using it to wrap the tassels).

Steps-

  1. Start making tassels! Use your thumb to hold the end of your thread to the book or small picture frame. Wrap 50 times (50 was the sweet spot for my tassels, but depending on the thread/yarn you use you might want to adjust this amount). Use scissors to cut the thread off of the book/frame.
  2. Cut a piece of thread ~7″ long. Lay your tassel strings across the thread. Tie the piece across the middle of your threads (feel free to make minor adjustments to get the ends even before tightening the knot.
  3. Cut another piece of thread ~10″ long. Tie around the top portion of your tassel. I recommend tying it higher than you want it, as it’s easy to scrunch it down the length of the tassel to your desired level. I wrapped the thread a few times to give the tassel a defined head, then knotted it and let the ends drape down to blend into the body of the tassel.
  4. Repeat approximately 200 times. I highly recommend finding a good Netflix show to binge!!
  5. Tips to speed things up: I streamlined my tassel process by doing six at a time. I would do 6 sets of fifty wraps on my little book, cut 6 x 7″ strings and 6 x 10″ strings, then put those tassels together. It seemed to go a little quicker than doing one at a time!
  6. When you have enough to begin building your chandelier, grab one of your floral hoops. I ended up using 80 tassels on my 19″ hoop, 60 on my 14″ hoop, and just under 40 on my 10″ hoop. I double-knotted each tassel and shuffled them around until I was happy with how “full” the layer looked.
  7. Building the chandelier was a little challenging. I divided the tassels into even sections so the sides would all be balanced. I used wire in between each section to connect the largest level to the mid level and the mid to lower (note: I used string initially, but it was tough to keep in place and didn’t offer the support that wire offered). There was a lot of scooching involved.
  8. Finally, connect your hanging chain to the top layer. Since I wanted mine to mount close to the ceiling, I cut my chain to 14″ and attached the ends at three intervals around the hoop. Then, I secured the three chains together with some wire. I looped it over a swag hook in my ceiling and went about fluffing and balancing the chandelier. It was slightly precarious, but after some negotiating it finally maintained its composure. I was thrilled!!

Here’s a quick tutorial video on how to make a tassel:

Oops– cut the top of my head off. #framingflaws

Final cost for the project was right around $30. Labor time was about 8 hours, but considering I was able to watch an entire season of Killing Eve… hard to complain! I’m super happy with it– definitely one of my favorite projects to date.

DIY

DIY 003: Tackling a Cushioned Counter Stool

We live in a rather large condominium complex. While the amenities are great and there are plenty of places for our dogs to run around, there is also a consistent stream of moving trucks in and out of the community. It seems, though, that not all furniture is worth moving. On a regular basis I discover chairs, tables, mirrors, lamps, and artwork dumped in a pile beside the dumpster. At first, I kept everything I could lay my hands on. Who would get rid of this stuff?

[To be fair, we moved into our unit right as COVID hit and in the interest of our finances we decided against buying any new furniture– even though we had a second bedroom now, a much larger living space, and very little lighting. It was a struggle for my inner decorator, but I was toeing the line.]

Just call me The Scavenger. I picked up a desk lamp, a nightstand, a wrought-iron bookshelf. I stockpiled everything in the guest room, turning it from a very empty space (ideal for working out) to a storage closet (guess how my workouts have been going lately). My intent was to turn these pieces into usable furniture with some wood filler, fresh paint, and updated knobs.

[For those of you gagging over the thought of picking up ‘trash’ especially during the pandemic, I rigorously sanitized everything with soap, water, and bleach! Then I left it by the front door to air out. Then I kept it locked up in our guest room away from our daily routines. Not taking any chances here.]

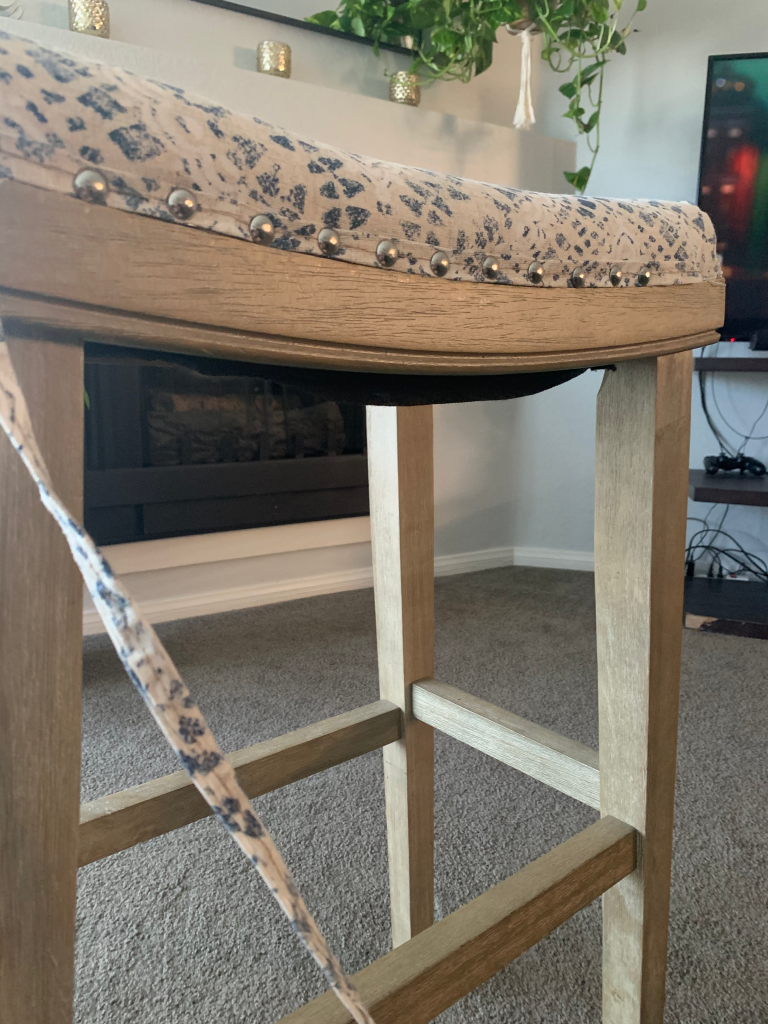
After skipping a week’s worth of cheap laminate tv consoles and broken picture frames, I finally came across a worthwhile piece: a cute, slightly stained, modern farmhouse-style counter stool. A few years ago, I reupholstered all of my dining table chairs so I thought there was a chance I could restore this little beauty. I dragged it upstairs and got to work.

First step: Pry off the upholstery tacks… using a hammer, pliers, and other assorted tools. No idea what the proper way to accomplish this task is, but I was able to save all of the tacks!

Then: Figure out how to *carefully* wrench out all the staples.

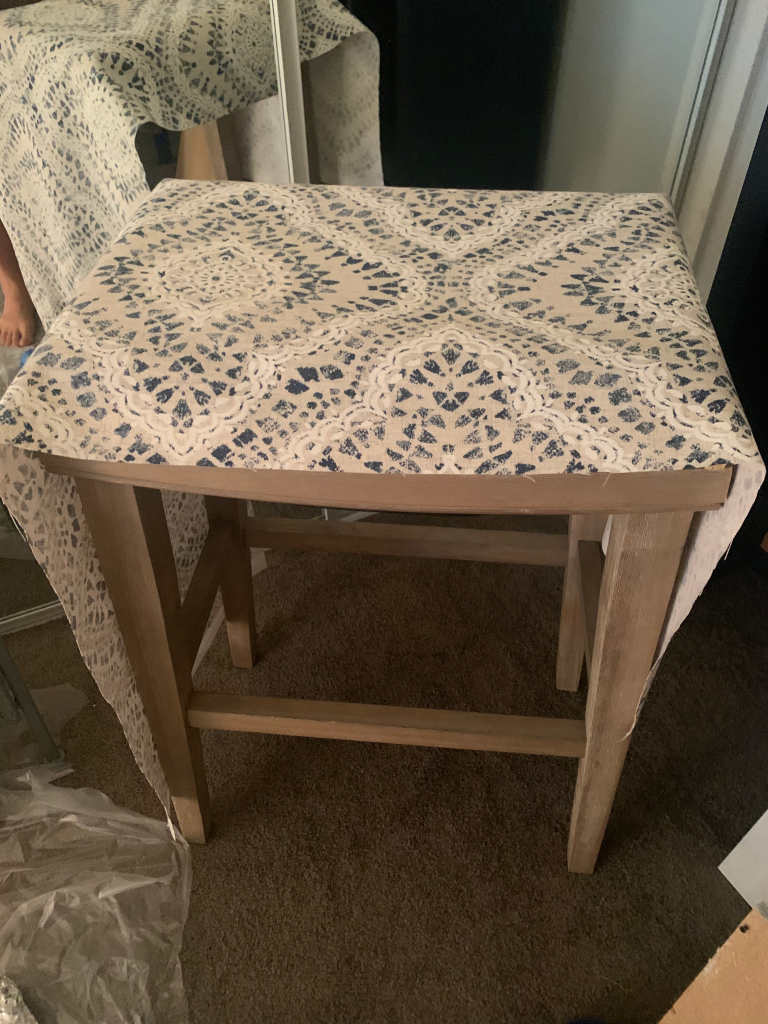
Next stop: JOANN Fabrics for something more fun and modern. I found this beautiful patterned upholstery fabric on sale for $18/yard. I purchased 1/2-yard to allow for some cutting mishaps!

Then: Figure out how to sew the corners. Thankfully, I had the template of the original seat cover available to analyze. I carefully cut two-inch slits at each corner and pinned the seams together. The first corner took me a couple tries to get right, as my initial attempts didn’t have enough of a curve to them and ended up sticking out at odd angles. When I finally got all four sewn, I fitted the new cover over the seat.

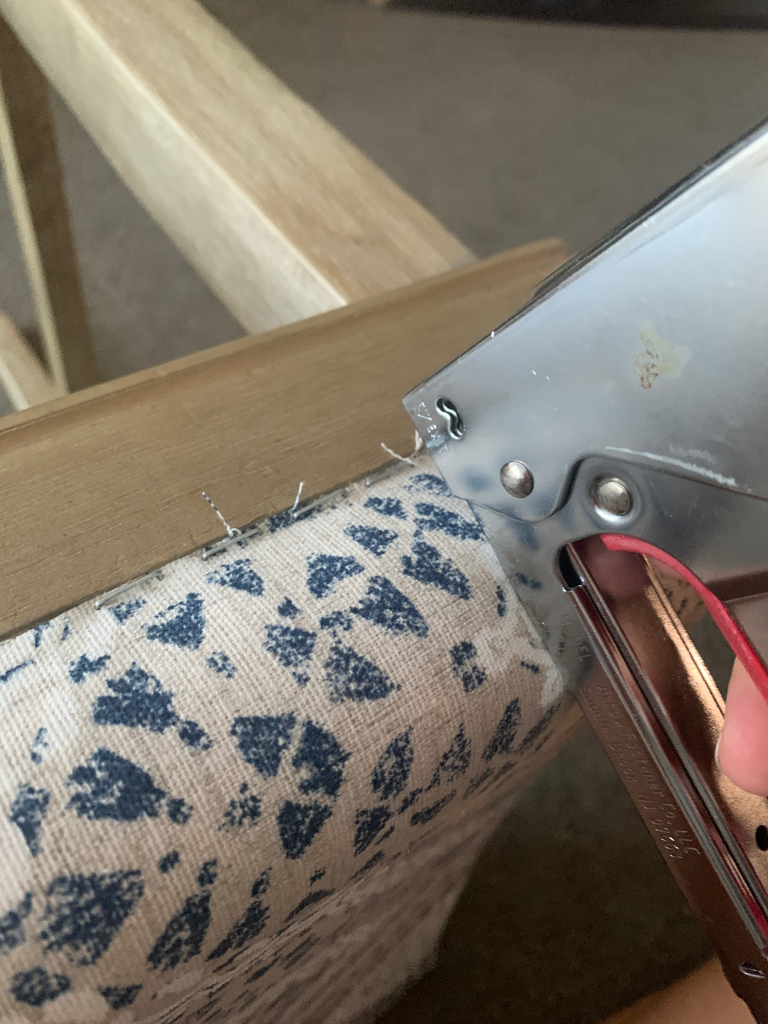
Next: Staple the edge to the chair. My staple gun worked exceptionally well for this task.

Then came the truly grueling part of this project: Cutting and sewing a 1/2″ fabric band to cover the stapled edge. I don’t have a sewing machine. It literally took me hours to stitch this by hand. So. Annoying. However, it turned out just fine and I began to nail the tacks in to keep it in place. Some of the tacks were bent, due to my aggressive pulling tactics. I had to get a little creative with how I angled them so they were still spaced out evenly.

The final result was better than I could have hoped for! The colors worked really well together and you could barely see the small scuff marks on the chair legs.

As much as I loved this little chair, I didn’t have a place for it in my apartment. I listed it on Craigslist and the Facebook Marketplace to see if anyone would pay me for my efforts. Unfortunately, a lot of people were in the process of moving and trying to offload excess furniture (remember– I did find this in a pile by our dumpster). I lowered my price and lowered my price, knowing I only needed one person to like it enough to buy it. After two weeks of silence, a woman asked if she could pick it up in thirty minutes. I said, “Absolutely!” and practically ran out the door with the stool.

Twenty dollars richer (and with a newfound confidence in my furniture flipping abilities) I returned to my guest room and looked at the array of orphaned pieces.

“I will find homes for all of you.”

DIY

DIY 002: Watercolor Painting- Part 1

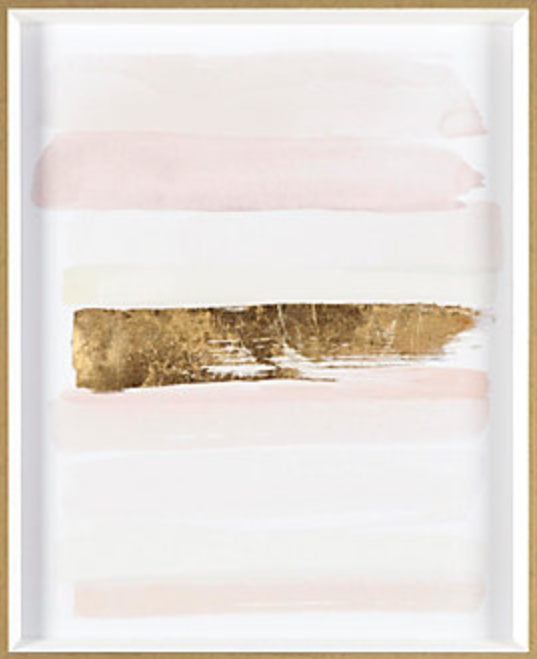
Back in February (during the pre-COVID era), my husband and I were strolling through our favorite, local outdoor shopping center and we wandered into a home decor store called Z Gallerie. I loved the ridiculously gaudy nature of the shop’s collection. My husband hated it. “It’s all useless!” he declared with a broad sweep of his hand and an exasperated sigh. I giggled because, well, he’s absolutely right. Who needs a giant glass octopus beverage container for their dining room table? But who wouldn’t want one? One piece did catch my eye, though: a large, framed watercolor painting of four horizontal brush strokes in varying shades of pink. It was so simple, yet the massive, metallic frame made it seem glamorous. The price tag read $249.95. “I bet I can make this for under $50,” I told Jimi. He looked at me with genuine concern and asked, “But why would you want to?”

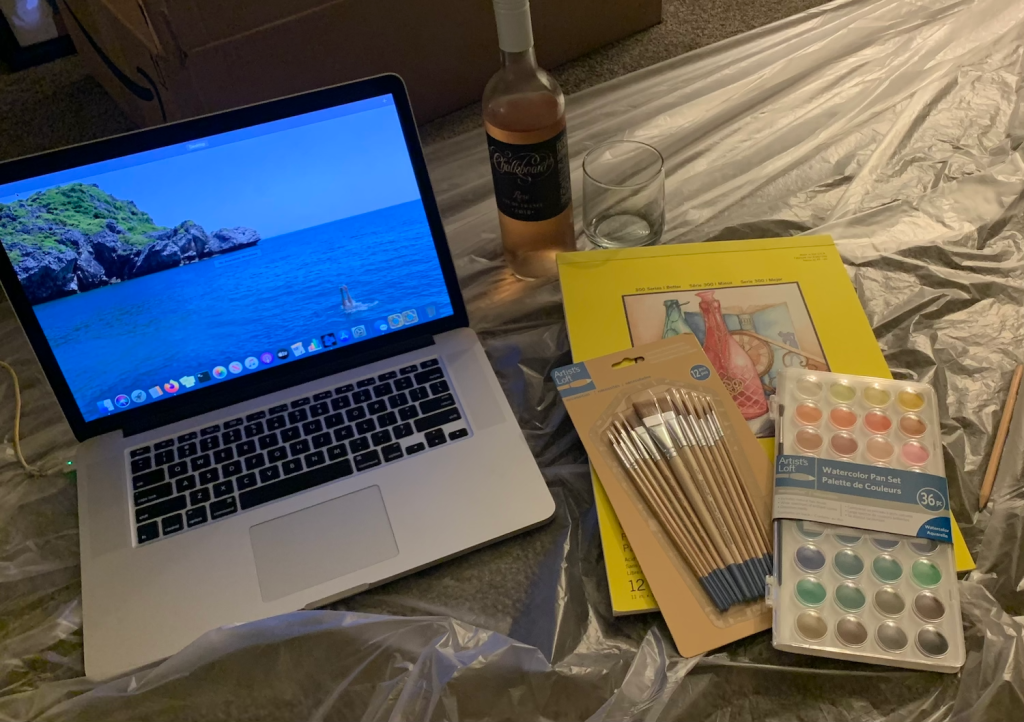
The next day I went to Michaels and purchased paint, brushes, paper, and three frames for $25 (thank you for those coupons, Michaels— you are truly the new Bed, Bath, and Beyond). I then stashed the bag with all these goodies behind my dresser and promptly forgot about them. My inspiration was as fleeting as the fads at Z Gallerie.

Fast forward to a few months into quarantine: I re-discovered that bag of brand new art supplies and felt like I’d won the lottery! Hurrah! A new project I can use to distract myself from how terrifying the world is right now!

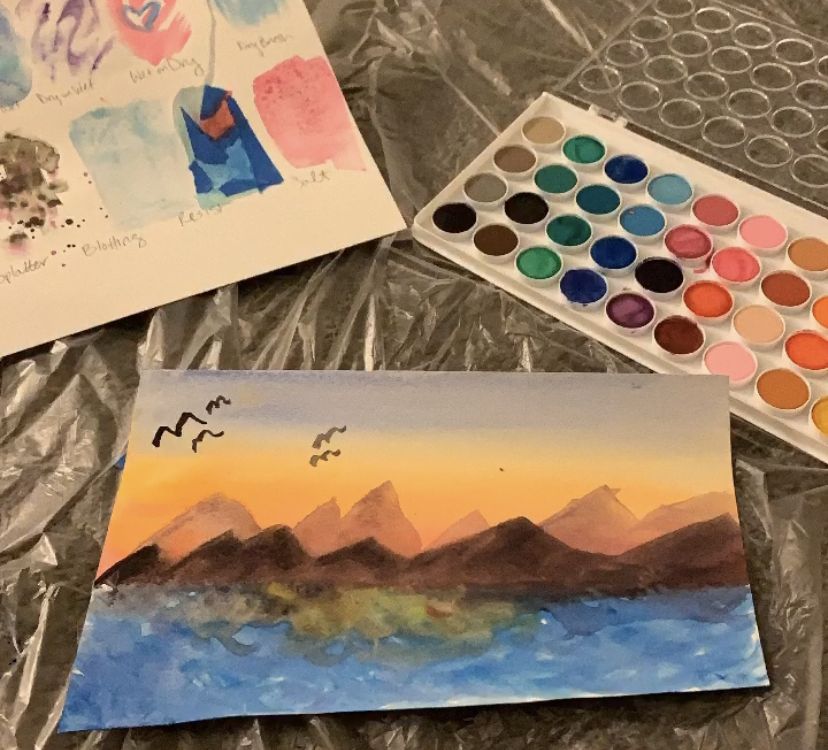
Instead of recreating the original watercolor inspiration piece, I decided to instead focus on learning basic watercolor technique. My friend, Lauren, had heard about a class that her husband’s friend was conducting via Zoom. We both signed up and logged on at the appropriate time. For $10 we got an hour-long tutorial on the various painting techniques used in watercolor. 

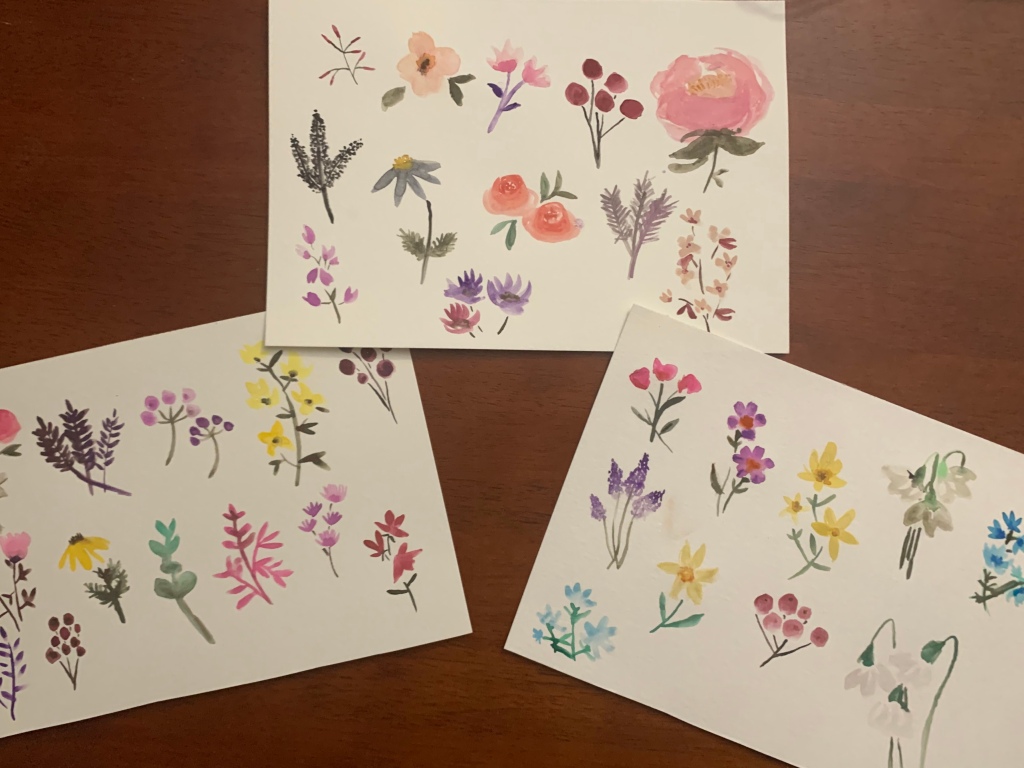
Now, I definitely didn’t need to pay ten bucks for a class. The personal interaction was sweet and it was great to feel like I was supporting the artistic community, but tbh there are so many great resources on YouTube. This video includes all the basic watercolor techniques we learned in our $10 class. And this one is a great one for making small flowers (actually, everything on Shayda Campbell’s channel is magic). Lauren and I have been sharing videos and our latest endeavors with each other since that first class. It’s nice to have some accountability (and encouragement) along the way. 

I’ve been painting about once a week (on average) for 3-4 hours a session during the last three months. I’ve never practiced art this consistently before and the amount of tangible progress I’ve made is incredibly motivating. Watercolor is an easily accessible art form (low cost, simple technique, plenty of access to instruction) that offers unlimited growth potential. I’m starting to learn how to blend and shade colors, how to get the right water : pigment ratio on the page. It feels very organic and exploratory.

The other great thing about watercolor painting is that it is fundamentally an imperfect art form. Water has a mind of its own and soaks into the page in different ways. You can drip it, push it, dry it, and try to force it to do what you want. But ultimately, it’s simply going to do its thing. Everything you make with watercolors is going to be unique and flawed– and the final product will be better for it.

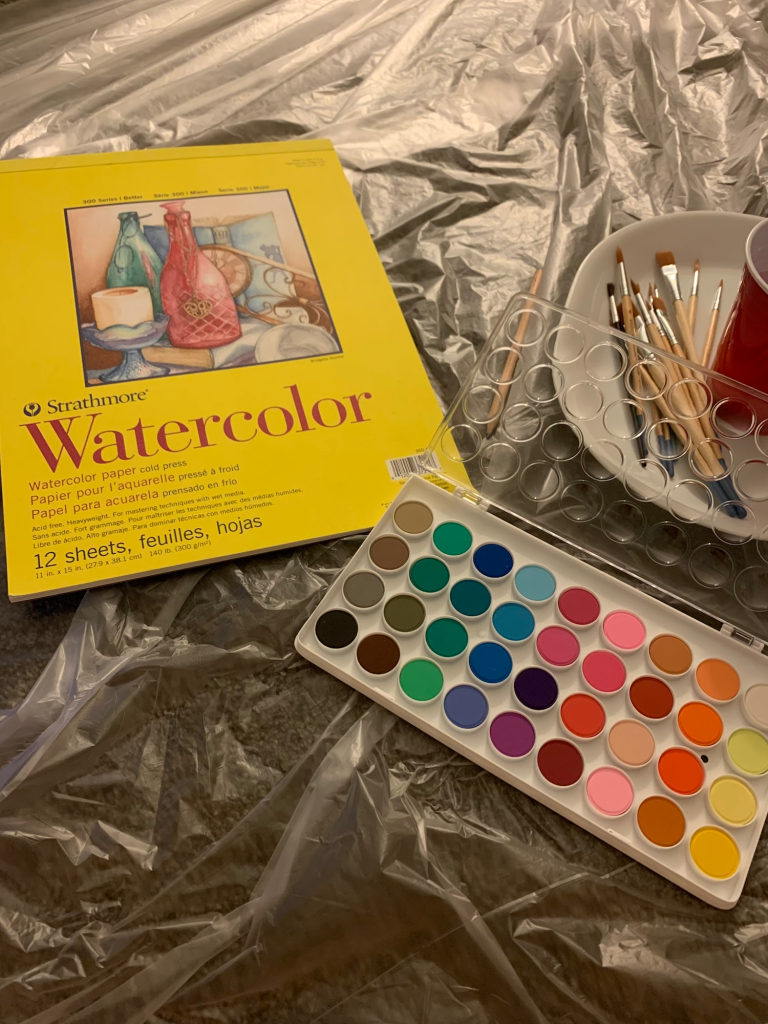
Interested in trying your hand at watercolor? Here’s some equipment to get you started:

I purchased my paints and brushes at Michaels, but these are really similar.

This is the exact pad that I currently use. I typically cut the sheets down to 8″x5″ in order to fold them into 4″x5″ cards. I do like having the option of using the full sheet for a landscape or a framed picture, though!

DIY

DIY 001: Macrame Plant Hanger

Hey y’all– I decided to spice up the old blog with some of the fun projects I’ve taken on during quarantine. Enjoy!

Plants are my new best friends
(just don’t tell my dogs).

In late May, I decided to take a little field trip into the heart of Los Angeles. Driving further than I had in months, I gloried in finding street parking in the very heart of the Flower District. I put on my mask and prepared to steer clear of fellow shoppers (AKA potential COVID carriers). Only, there was hardly anyone in sight. I was the only one on the sidewalk. I walked by several small shops that had corded off their entrances for shoppers, offering pick-up only. The first shop that allowed guests drew me in like a moth to a flame. It was filled with green houseplants– not a flower in sight.

I went a little crazy. I grabbed a Golden Pothos plant, then a pretty Peace Lily, followed by an interesting looking Pearls and Jade Pothos. I turned to the shopkeeper and asked, “Do you mind if I put these on the counter?” She shrugged and gestured to the empty shop. “Thank you!” I said, dumping my finds on the counter and diving back into the potted plant jungle. I added some smaller succulents to my collection, as well as a baby ZZ plant. Thankfully, the prices in the Flower District were the primary reason for my trip — my entire counter full of plants cost less than $50. After loading up the car (and splurging on a bright bouquet of spring blooms), I drove my new plant family back to my apartment.

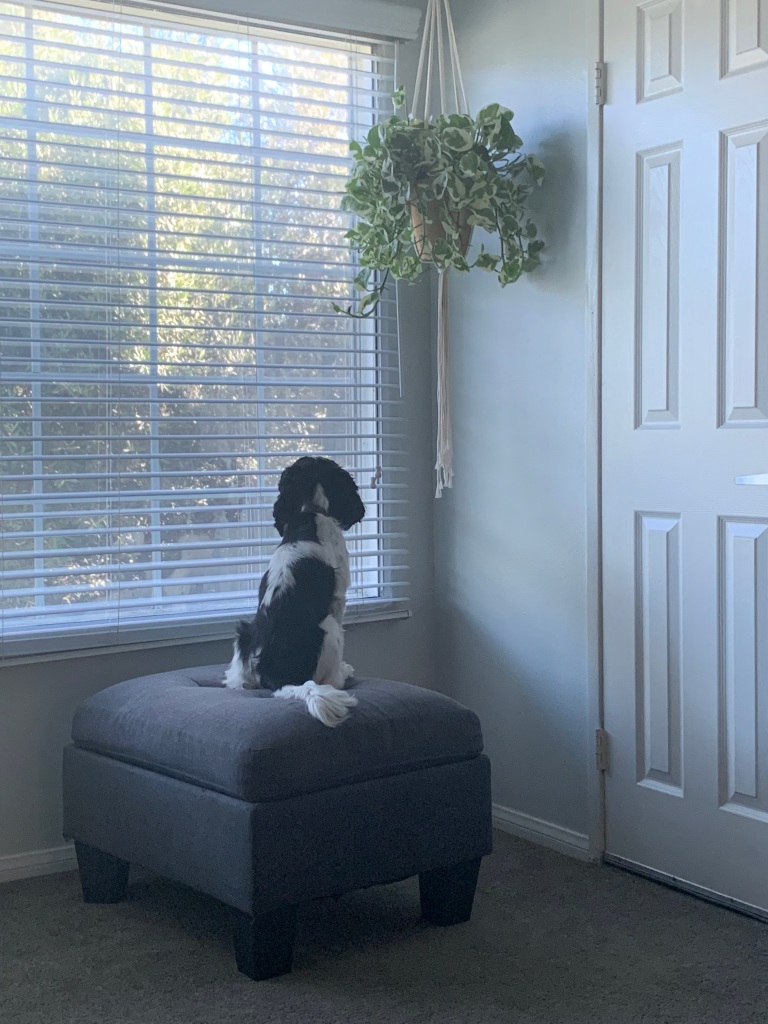
Did I buy enough? Spicey seems to think so.

Plants? Check.

Counter space? Umm….

I needed to hang these babies. Several of the plants came with hangers, but they were basic and rugged — more suited for a back patio than a living room. A google search ensued. Thankfully, I stumbled upon Persia Lou’s website where she offers detailed instructions for creating the perfect macrame plant hanger. I ordered the macrame cord and gold hoops on Amazon, along with a couple of swag hooks for hanging.

Spicey is skeptical.
Tying my first set of knots.

I quickly realized that the most difficult part was going to be customizing the distance between the knots to suit the size of each unique plant. I decided to follow the precise instructions on Persia Lou’s blog the first time around and adjust on future attempts. It took a little work to get the knots both correct and spaced appropriately, but the directions are quite clear.

Once I finished my first hanger, I turned to the plants. I had purchased some plastic containers at Home Depot, but I didn’t want to see the plants in such generic-looking pots. I decided to jazz up the containers with some gold spray paint. On the first go, the paint pooled and dripped down the side, but it turned out to be a happy accident as it gave the pot a little more texture (almost like it was made of clay). When the containers were dry, I migrated the plants to their new homes.

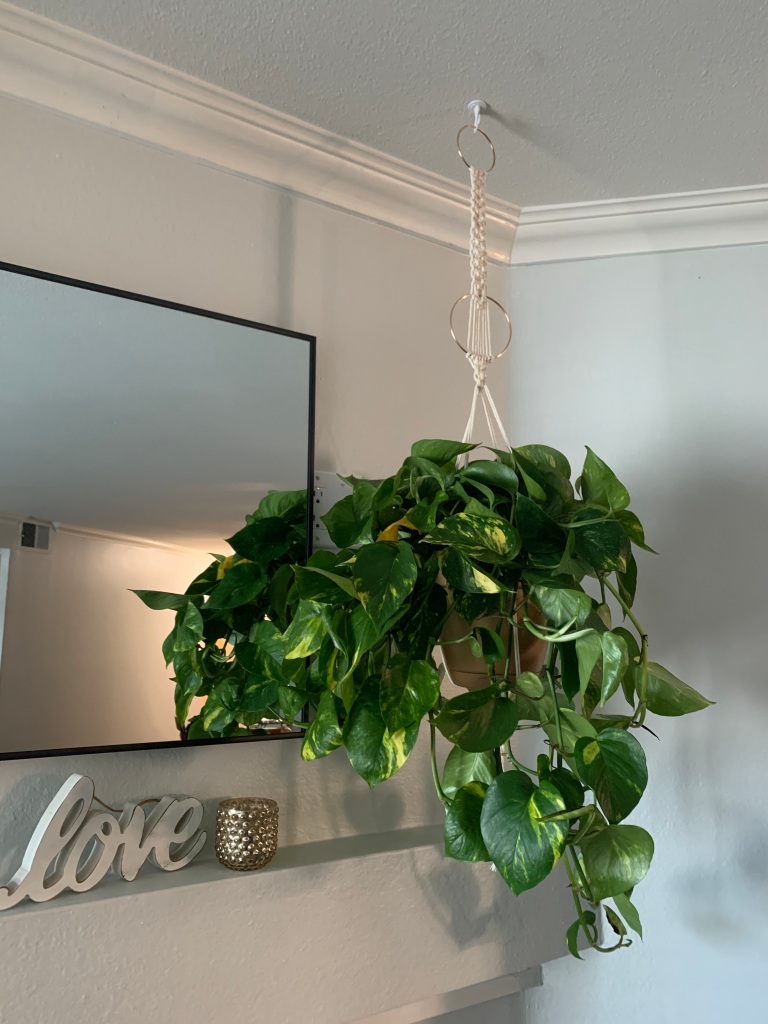
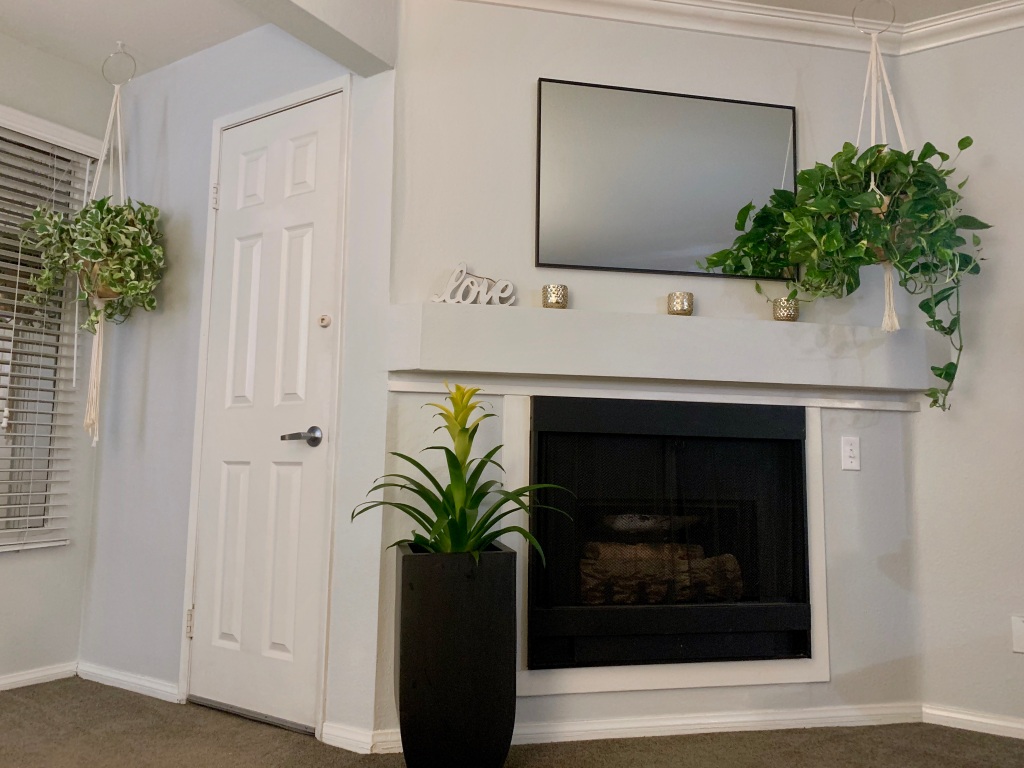
My first macrame hanger turned out to be perfect for the Pearls and Jade Pothos:

I went a little wild on the second hanger, trying out a new combination of knots. I thought the intricacy of the design was lovely, but when I placed the Golden Pothos in the hanger it looked constricted and awkward. The proportions were just off. I removed the pothos plant from the hanger and swapped in the String of Pearls succulent. It was a perfect match!

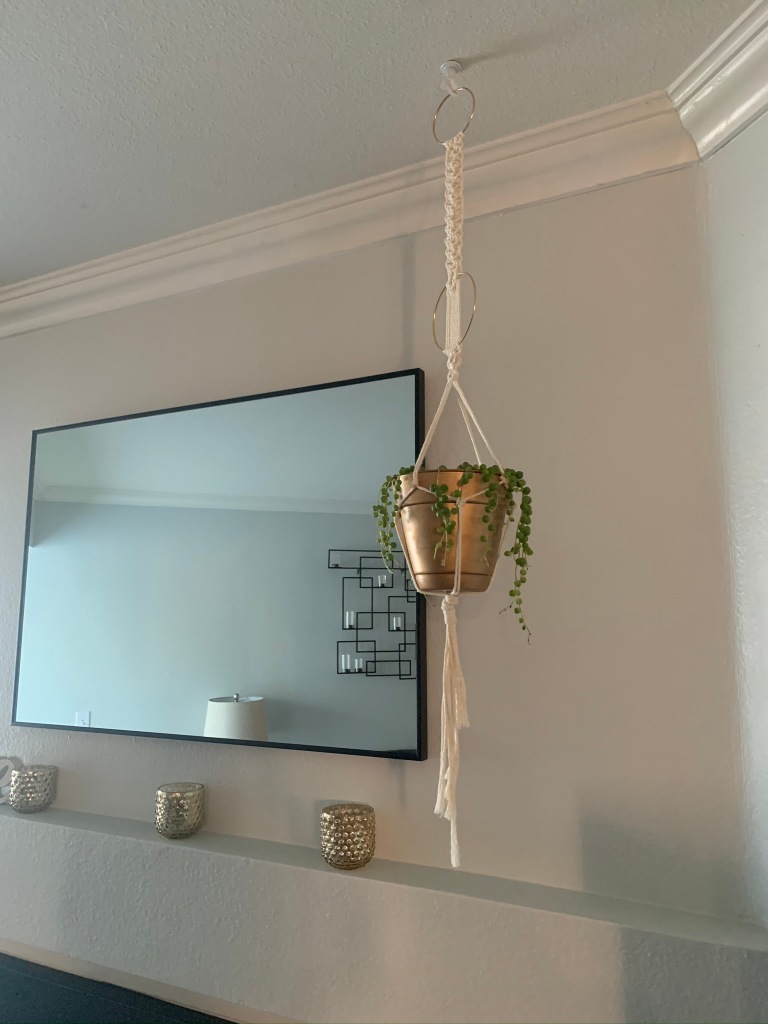
I made two more macrame hangers, one standard one for the pothos plant and one more unique for the Burro’s tail (see photo at the top of this entry). They both turned out quite lovely.

It’s been two months now and all the plants are growing like weeds! I’ve been trimming some of the longer pothos stems and placing the cuttings in water to propagate. We’re on a tight budget these days, so I’m excited about continuing to add plants to the collection without any additional cost!

Here’s a quick budget breakdown on this project:

4 Plants (2 Pothos x $8/each , 2 Succulents x $6/each) = $28

4 Plastic Planters (2 6″ x $1.97, 2 8″ x 2.97) = $9.88

1 Bag Indoor Potting Mix = $4.99

1 Roll Macrame Cord = $9.99

5 Metal Rings = $3.35 (15 = $10.06 on Amazon)

4 Swag Hooks = $11.96

Grand Total: $68.17

Less than $20/each! I’m obsessed with my new friends. BONUS: Pothos plants filter your air!! Can you beat that during a pandemic?

Have you adopted any plants during quarantine? I’d love to hear about them! Also, let me know if you have any questions. Thanks for reading!