
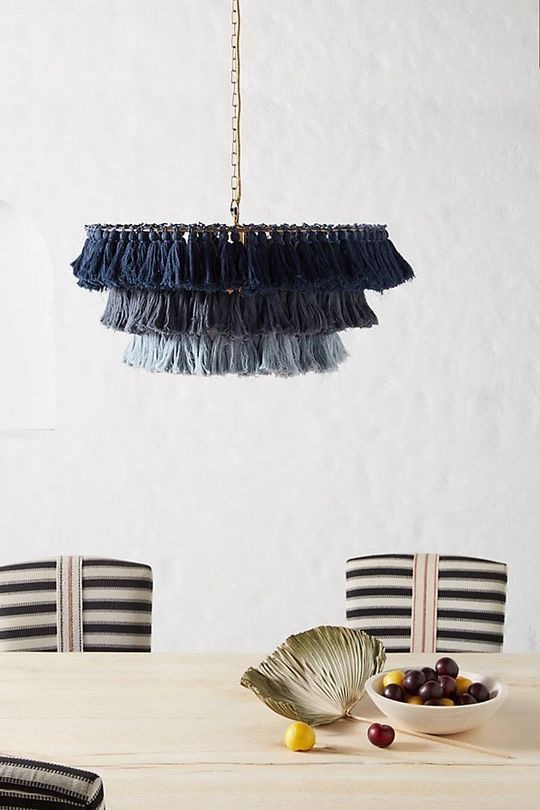
Anyone else obsessed with Anthropologie’s Fela Tasseled Chandelier? I’ve been seeing it everywhere lately (ok, Google algorithm, stop tempting me already). After watching a third Instagram home renovator hang the light, I was convinced: I could totally make one.

I found some homemade versions on Pinterest and Etsy, but wasn’t overly impressed. The thickness of the tassel thread made a huge difference on the overall appearance (thick yarn looked particularly tacky). I also thought three layers of shorter tassels looked more glamorous than two layers of longer. I was really inspired by some of the ombre looks, though!
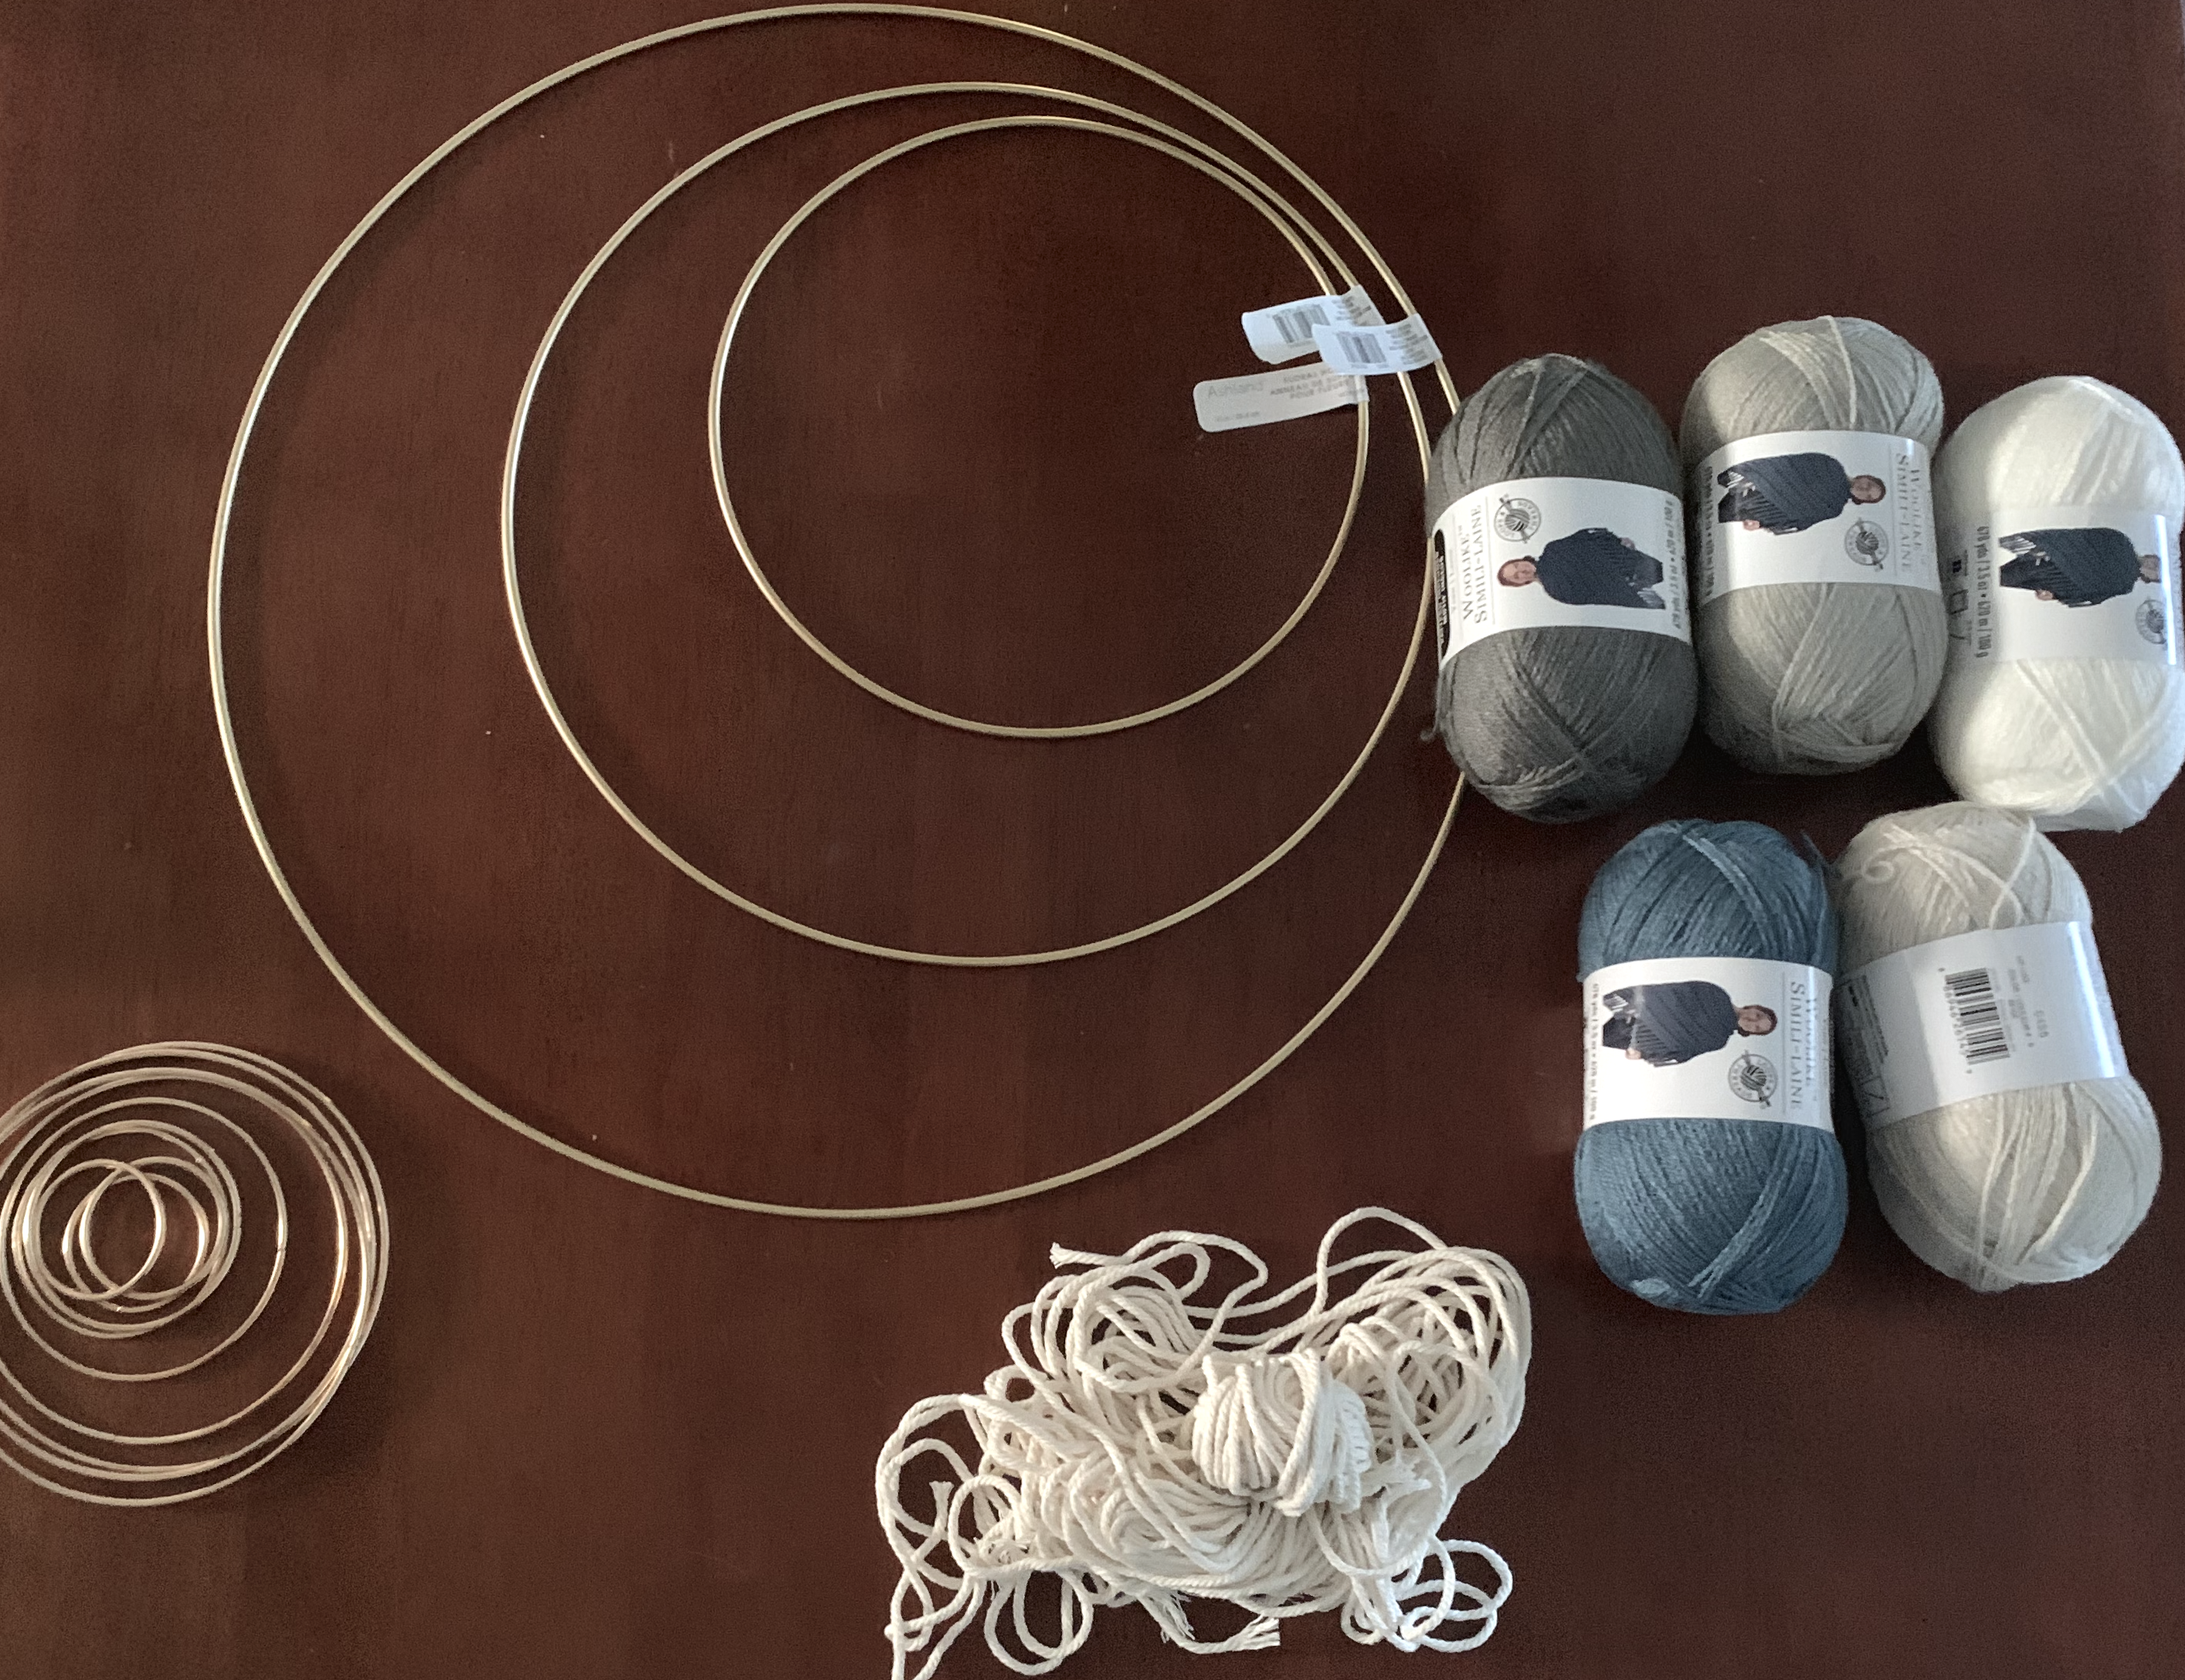
Instead of ordering thread on Amazon, I decided to go to Michaels and actually look at the options available. I landed on a crochet thread called Woolike Yarn by Loops & Thread, based on the color availability, weight of the strands, and the price. While I was there, I also picked up three floral hoops, some gold wire, and a gold chain. Here’s the full supply and cost list:
Materials–


- Woolike Yarn– I ended up using about two spools of yarn per ring. If you’re doing it all one color you could probably get away with five spools.
- Gold Chain– I ended up splitting this into three pieces and attaching them together with a small loop of wire as my “hanger”.
- Gold Wire
- Floral Hoops – I purchased a 19″, 14″, and a 10″ in gold
- Gold Wire
- Scissors
- Small Book or Picture Frame- I used a small, hardcover book of poetry that was 4.5″ wide and 0.75″ deep (the length from top to bottom doesn’t matter, as you’ll just be using it to wrap the tassels).


Steps-
- Start making tassels! Use your thumb to hold the end of your thread to the book or small picture frame. Wrap 50 times (50 was the sweet spot for my tassels, but depending on the thread/yarn you use you might want to adjust this amount). Use scissors to cut the thread off of the book/frame.
- Cut a piece of thread ~7″ long. Lay your tassel strings across the thread. Tie the piece across the middle of your threads (feel free to make minor adjustments to get the ends even before tightening the knot.
- Cut another piece of thread ~10″ long. Tie around the top portion of your tassel. I recommend tying it higher than you want it, as it’s easy to scrunch it down the length of the tassel to your desired level. I wrapped the thread a few times to give the tassel a defined head, then knotted it and let the ends drape down to blend into the body of the tassel.
- Repeat approximately 200 times. I highly recommend finding a good Netflix show to binge!!
- Tips to speed things up: I streamlined my tassel process by doing six at a time. I would do 6 sets of fifty wraps on my little book, cut 6 x 7″ strings and 6 x 10″ strings, then put those tassels together. It seemed to go a little quicker than doing one at a time!
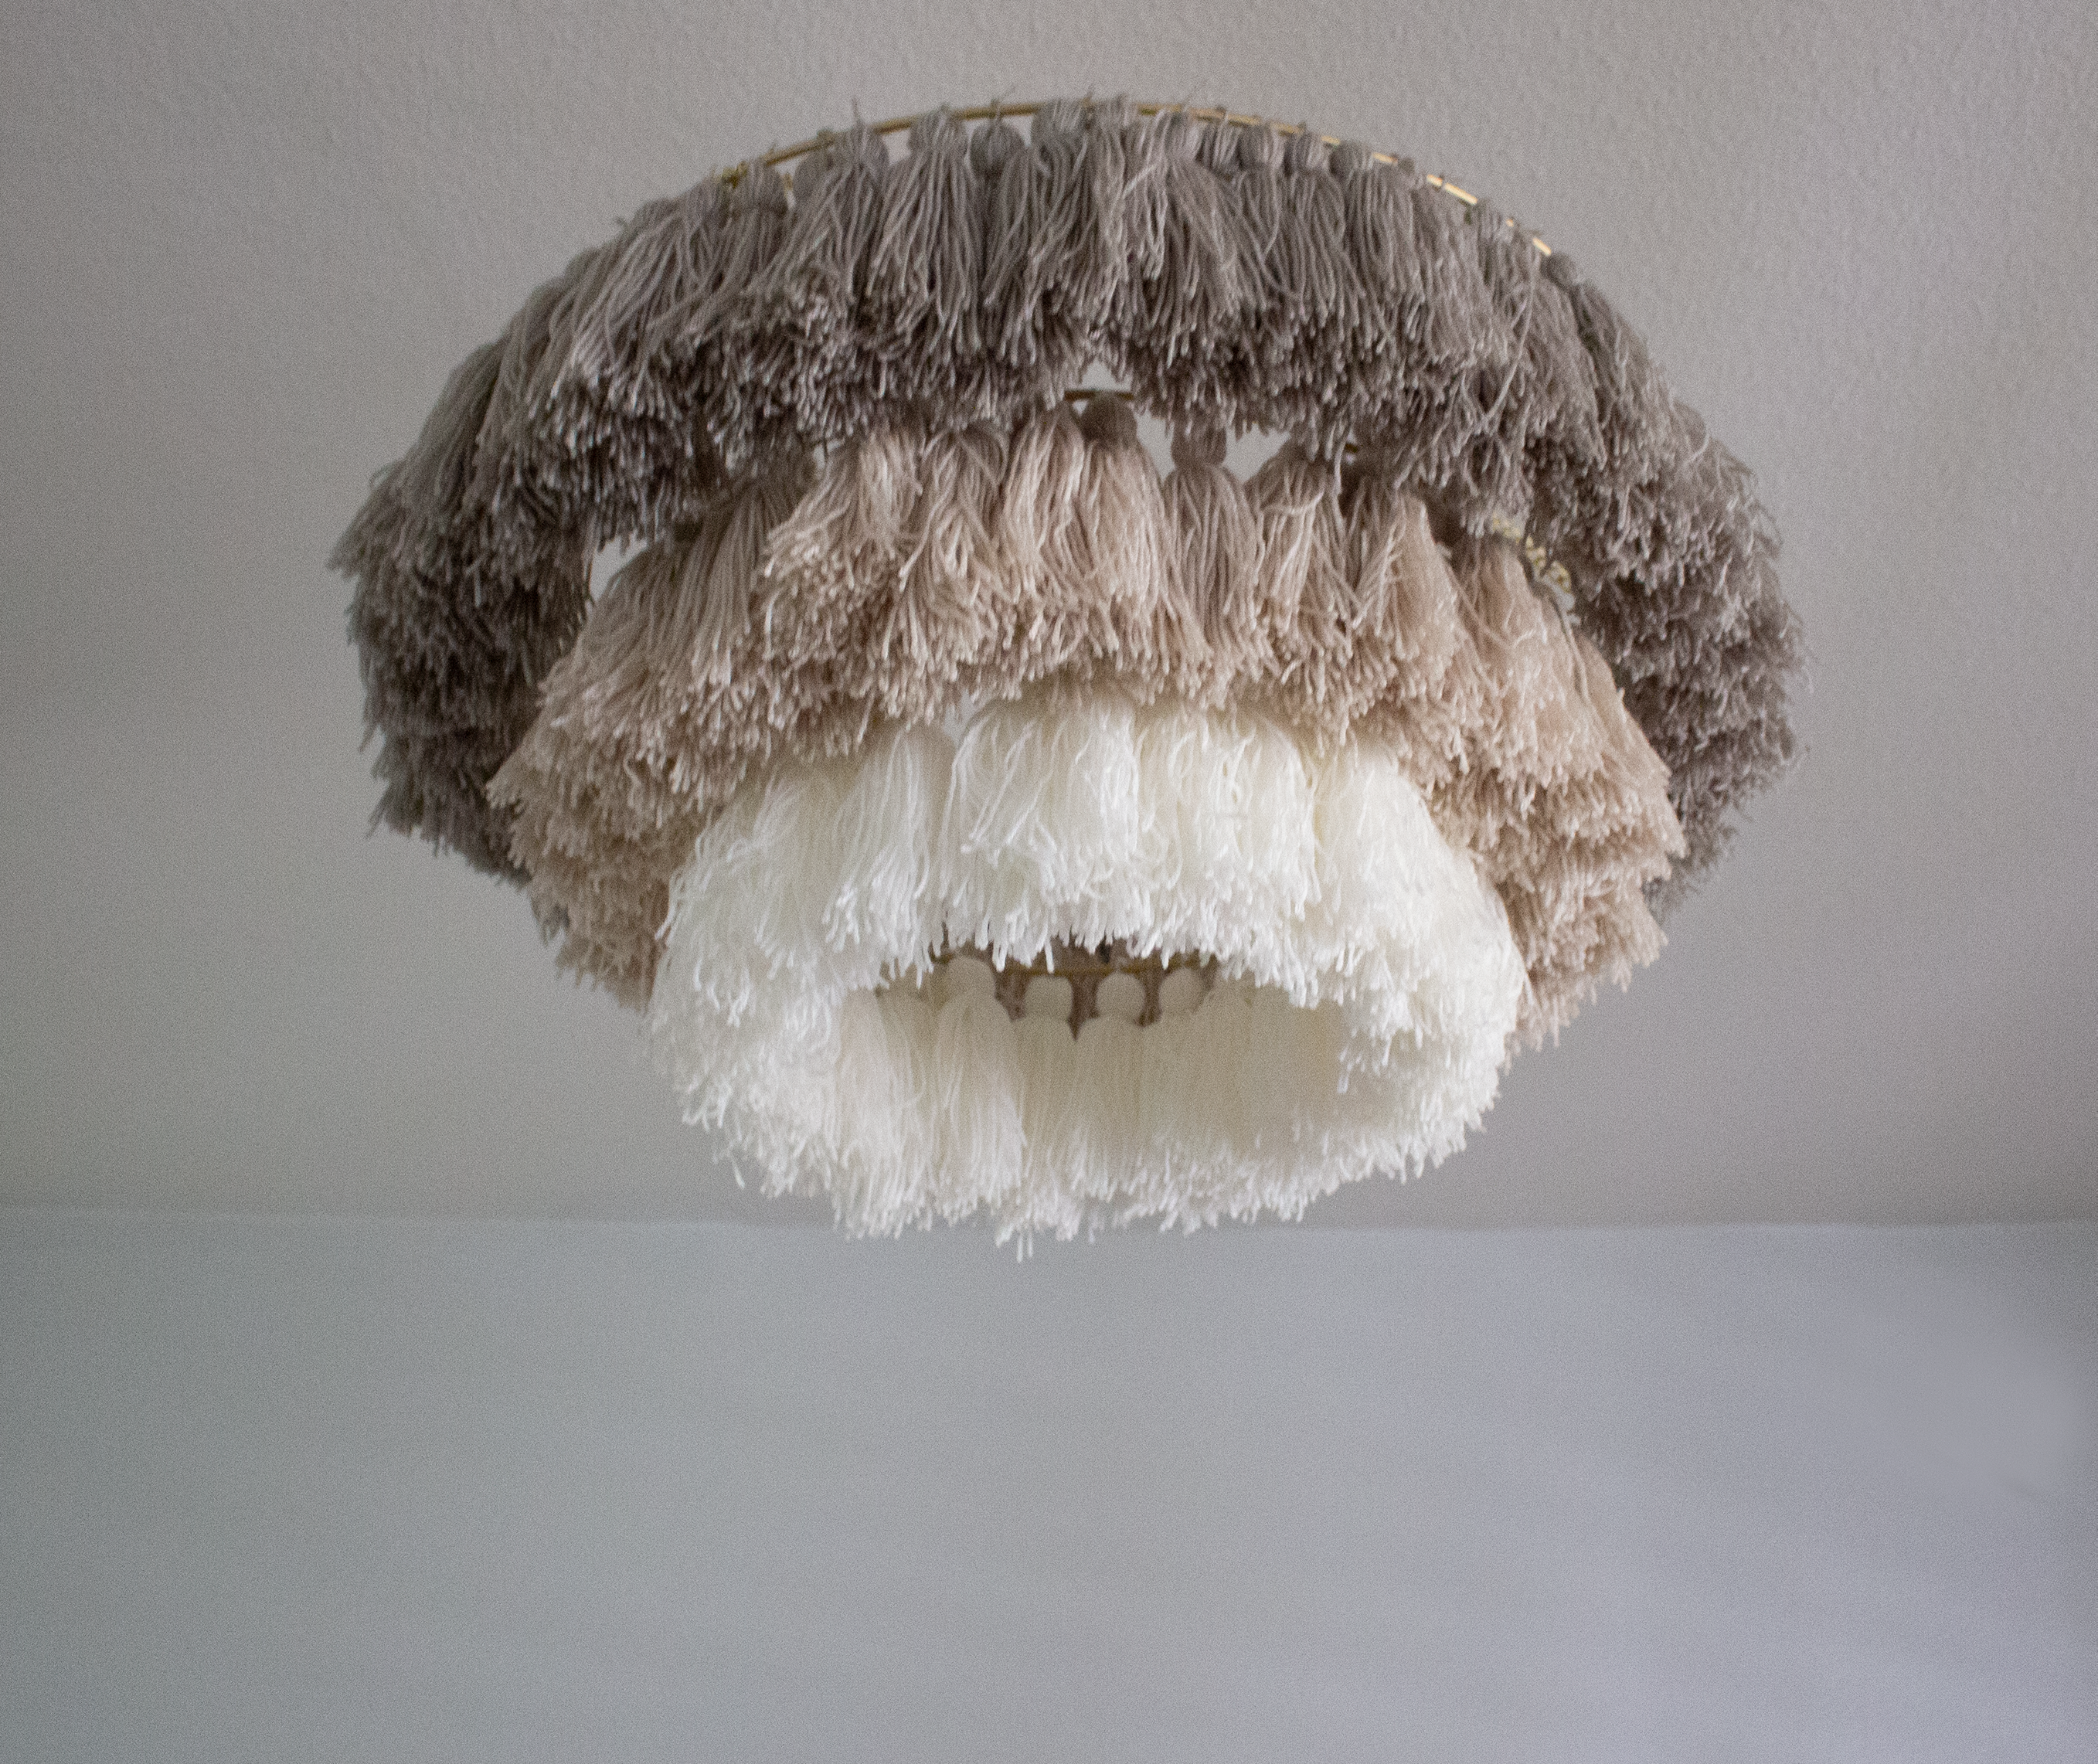
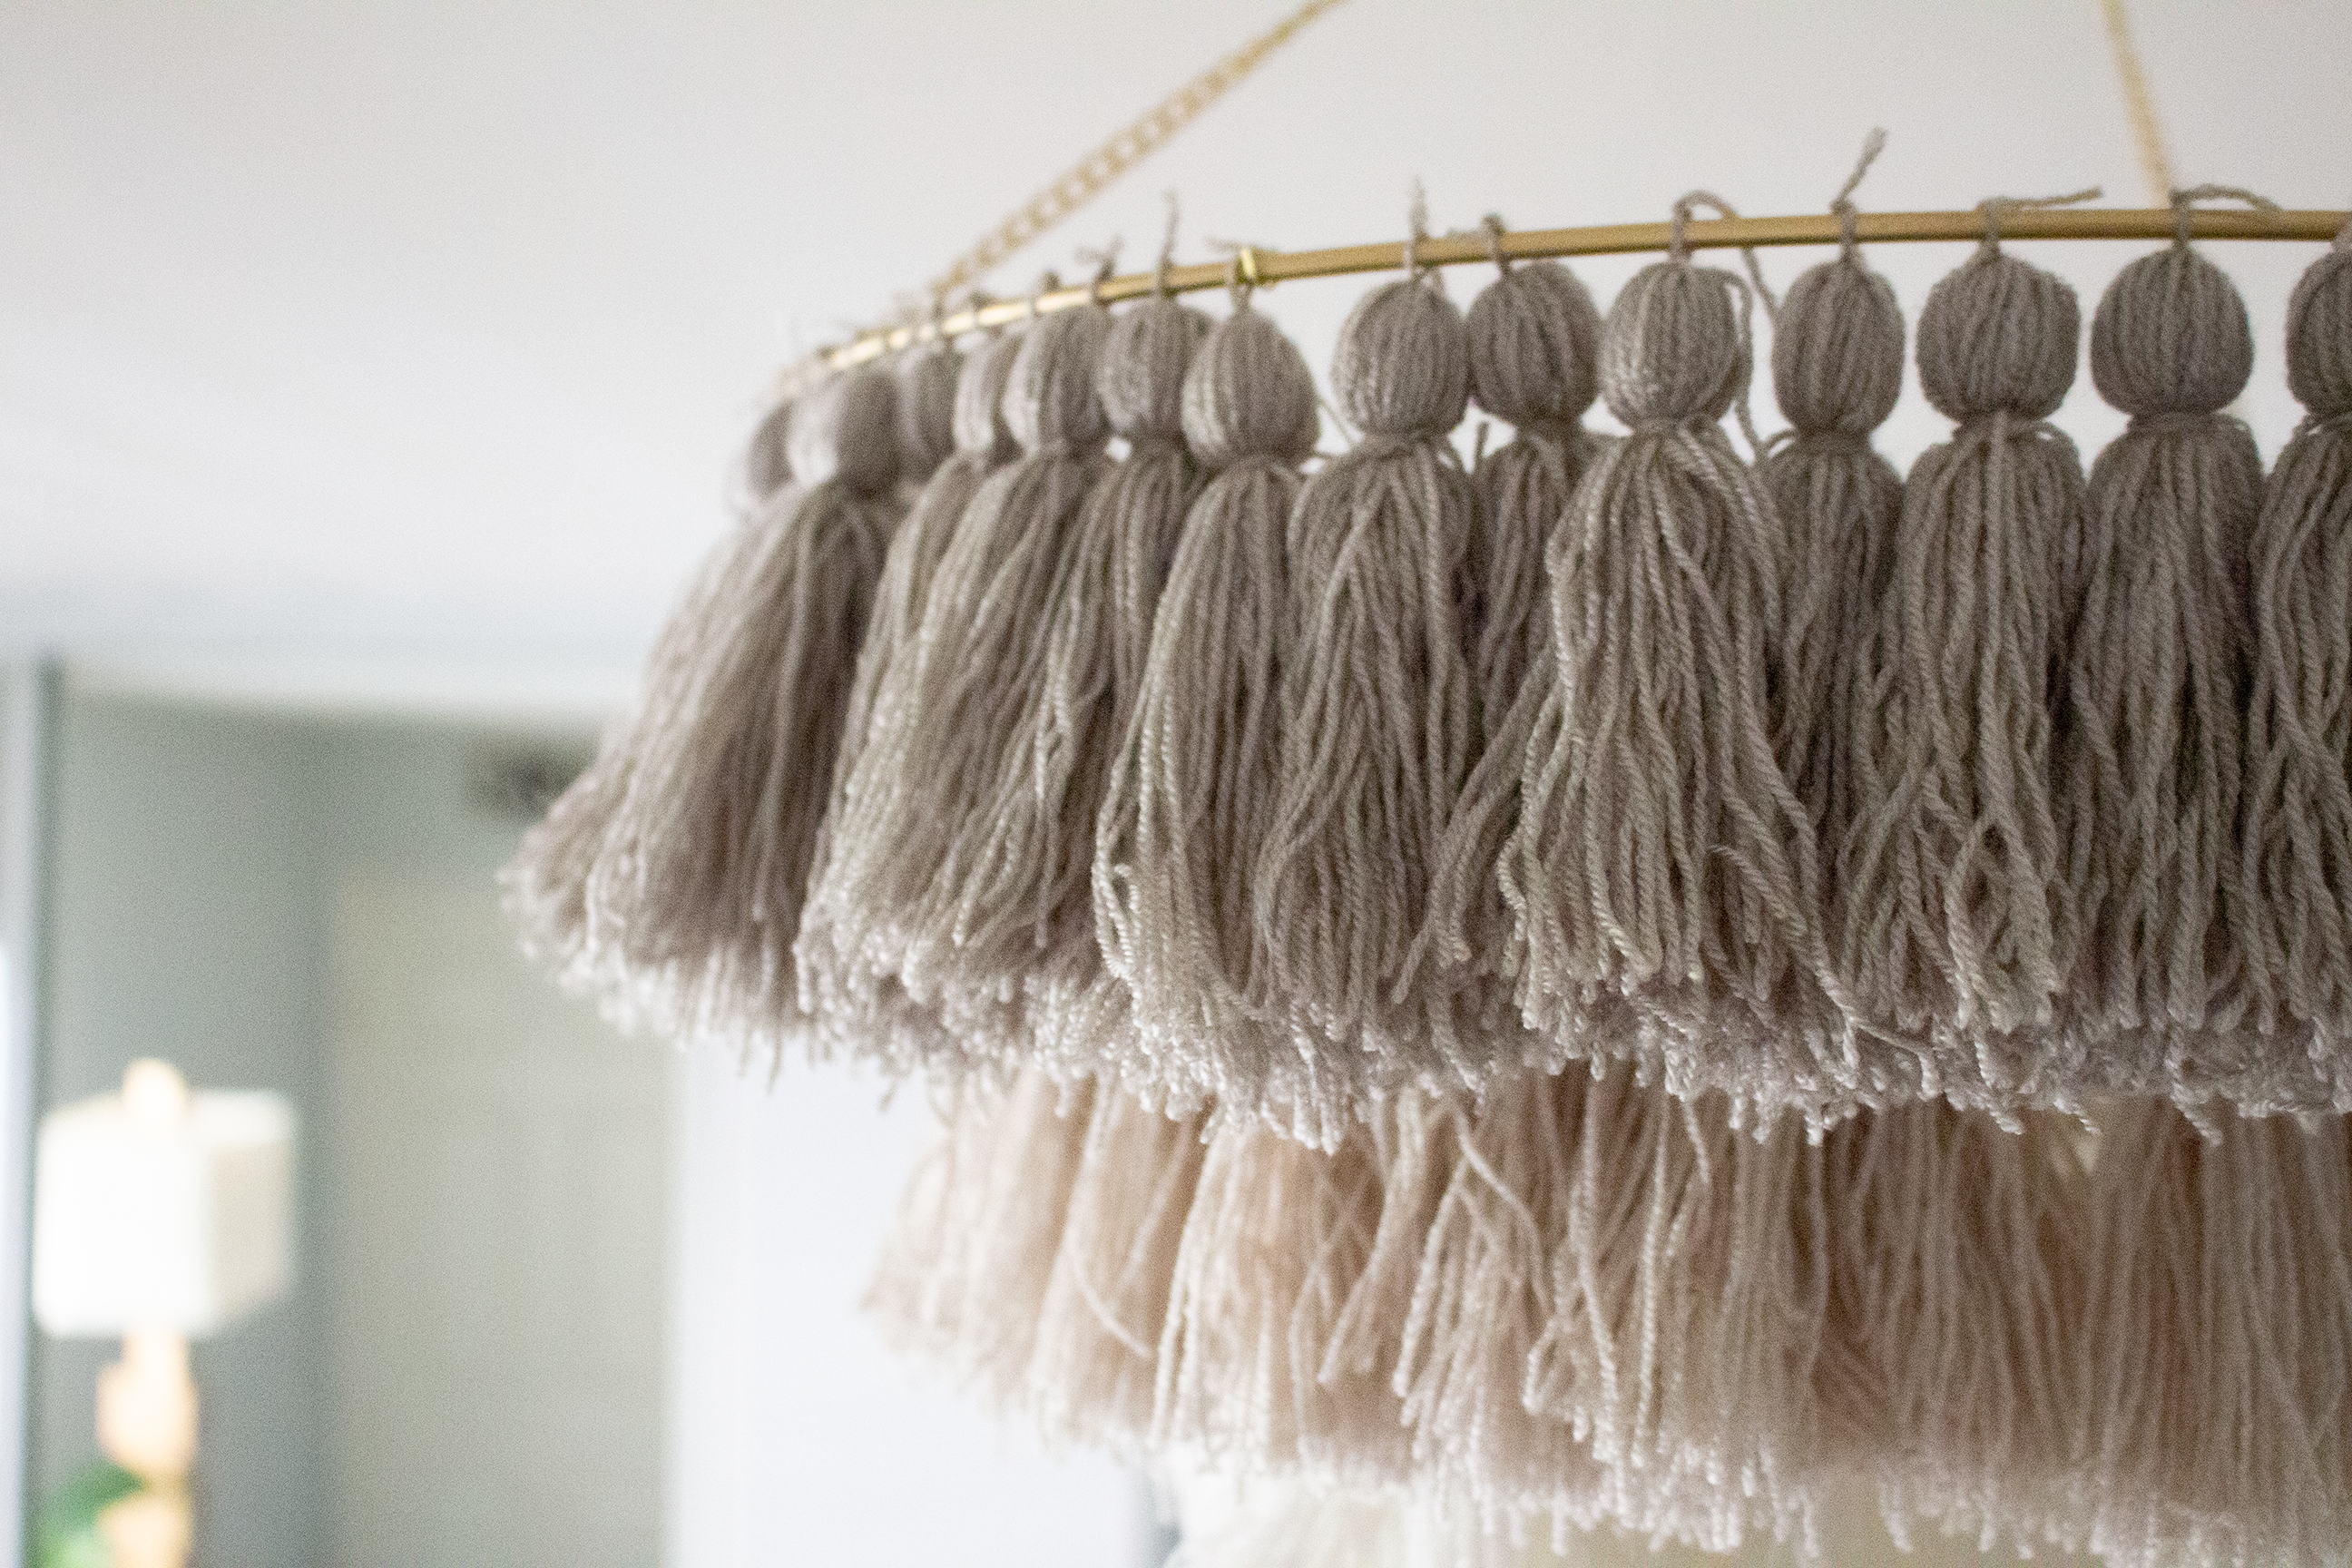
- When you have enough to begin building your chandelier, grab one of your floral hoops. I ended up using 80 tassels on my 19″ hoop, 60 on my 14″ hoop, and just under 40 on my 10″ hoop. I double-knotted each tassel and shuffled them around until I was happy with how “full” the layer looked.
- Building the chandelier was a little challenging. I divided the tassels into even sections so the sides would all be balanced. I used wire in between each section to connect the largest level to the mid level and the mid to lower (note: I used string initially, but it was tough to keep in place and didn’t offer the support that wire offered). There was a lot of scooching involved.
- Finally, connect your hanging chain to the top layer. Since I wanted mine to mount close to the ceiling, I cut my chain to 14″ and attached the ends at three intervals around the hoop. Then, I secured the three chains together with some wire. I looped it over a swag hook in my ceiling and went about fluffing and balancing the chandelier. It was slightly precarious, but after some negotiating it finally maintained its composure. I was thrilled!!
Here’s a quick tutorial video on how to make a tassel:
Final cost for the project was right around $30. Labor time was about 8 hours, but considering I was able to watch an entire season of Killing Eve… hard to complain! I’m super happy with it– definitely one of my favorite projects to date.

You are so creative!